Making A Simple Decking Platform
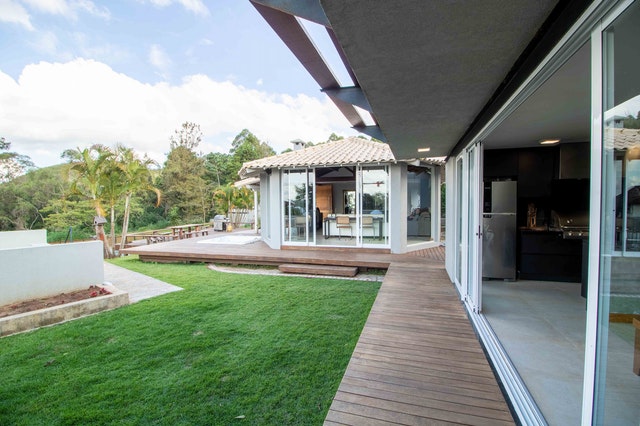
Constructing an area of decking, such as the platform below and on the next page, requires little in the way of building skills and no carpentry skills at all. Concrete blocks are used for the foundations, and laying the boards involves no woodwork joints. This construction method would suit a small patio or slightly raised boardwalks. Deeper, sturdier joists would allow you to increase the height.Using Wood Outdoors
- Use only lumber that has been pressure-treated with preservative to extend its outdoor life. Most processes give the surface a greenish tinge. This will not affect the finished color if you intend to stain it, but if you want the warmth of natural wood, look for special landscaping lumber that has been treated with colorless preservatives.
- Tropical hardwoods, such as iroko, combine great beauty with durability and, while very expensive, last a lifetime. Be sure that they come from sustainable forestry sources.

You Need:
Materials
- 16 boards, 8ft/2.5m×6in/15cm×1in/2.5cm
- 4 wooden joists, 8ft/2.5m×4in/10cm×4in/10cm
- 4 facing boards, 2 measuring 8ft/2.5m×4in/10cm×3/4in/2cm and 2 8ft4in/2.54m×4in/10cm×3/4in/2cm
- 4 55lb/25kg bags sand
- 12 concrete blocks
- 16 metal 2in/5cm angle brackets
- 2in/5cm nails/screws
- Wallplugs
Tools
- Spade
- Level
- Framing square
- Maul
- Drill and bits
Planning The Site
- Measure out the decking area, using 4 boards laid out in a square. Check that the corners form right angles by using a framing square. The marked-out area will be 6in/15cm larger than the desired 8ft/2.5m square platform, but the extra space will be needed for digging the foundation trenches.
- Mark out the boundaries of the work area by drawing the blade of a spade along the outside edges of the outside edges of the boards. Take care not to nudge the boards out of position before you have finished marking out the square. Put 3 of the boards to one side until later.
- Lay the joists, parallel to each other within the square so that they are evenly spaced. Use one 8ft/2.5m board to ensure that the first and last joists lie flush with the ends of the plank. Mark out a 6in/15cm wide border around each joist to determine where the trenches should be.
Preparing The Base Of The Decking
- Dig the trenches, They should be 1½in/4cm deeper than the depth of the concrete blocks. Line the base of each trench with sand, then firm it by treading it down and level it so that it forms a 2in/5cm deep bed.
- Lay the concrete blocks, 3 to a trench, placing one block at each end of a trench and one in the center. The blocks should stand above the soil by ½in/1cm so that the joists will not come into contact with the soil.
- Check the level of the blocks, both along and across the trenches, using a board and a level. If necessary, adjust the level of any block; lift it and add a little more sand or gently knock it down with the handle of your maul. Check the levels again.
- Backfill each trench around the blocks with more sand, treading it down as you go to create a firm base. If not compacted, the sand bed will settle naturally, the blocks will shift or sink, and the decking will warp. Level off the sand so that it is flush with the surface of the soil.
Constructing The Platform
- Lay the joists across the concrete blocks, then center them on the blocks. Check again that the first and last joists are exactly 8ft/2.5m apart, using one of the boards. The ends of all the joists should also be in line.
- Secure the joists in place using the metal brackets, on either side of each end of the joists. Place each bracket in position and mark the screw holes, one on the joist and one on the supporting block. Remove the bracket.
- Drill the screw holes to a depth of 2in/5cm, using a suitably sized masonry bit for the concrete and a wooden drill bit for the joist. Insert wallplugs in the concrete. Screw the bracket in place. Each joist requires 4 brackets.
- Put the first board into place. Lay it across all 4 joists so that its edge sits flush with the ends of the joists. Drill 2 screw holes per joist, drilling through the board and about ¼ in/6mm into the joist below. Then screw the board in place. For a finer finish, use a special bit to countersink the screws.
- Position all the boards across the joists, leaving a tiny space of ¼ in/6mm between each board. The last board should sit flush with the ends of the joists. Check that the boards are evenly spaced, then screw into place as for the first board. The gaps between the boards allow the wood to swell when wet without warping.
- Fit the facing boards, nailing them into place along the edges of the joists. Each board needs at least 4 nails to hold it. Secure 2 8ft/2.5m facing boards across the ends of the joists, then fit 2 8ft4in/2.54m boards along the length of the joists, so that they overlap the first 2 boards neatly at each corner. Trim the corners, if needed.
Raising Decking Levels
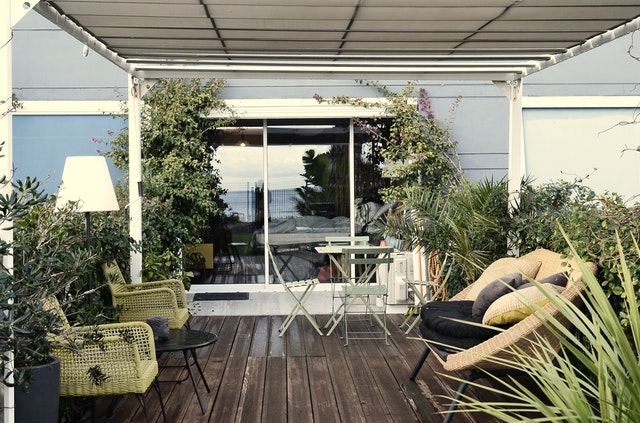
Laying decking at different levels is one of the simplest ways of introducing a visually interesting change of height to an otherwise level garden. The simplest construction technique is to screw or bolt a second tier onto the first. If using the above method, run the second set of joists at right angles to those used for the first tier, to give extra strength. The technique of altering the direction of the parallel slats lends an extra dimension of interest; it can also be used to emphasize and warn of a change in level. Diagonal slats are particularly effective.
Finishing The Wood
Since the range of wood finishes is now so extensive, check with your supplier that the one you have chosen suits the job at hand. Pressure-treated lumber needs only occasional treatment with preservative, but you may still wish to apply color for decoration or to offset the dulling effects of weather.
Adding Color
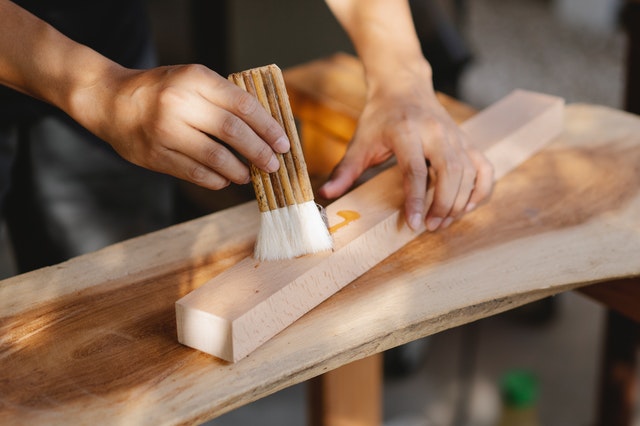
There are two basic ways of coloring wood: with paint or with stain. Exterior wood paints are opaque, with a “microporous” finish that allows wood to breathe and helps prevent peeling or cracking. Wood stains are translucent and darken and/or color wood. They penetrate the surface, allowing the grain to show through. Exterior formulas often include preservative. All surfaces must be clean, dry, and dust-free before treating. Before painting, wood will need priming and undercoating. Apply paint or stain with a good-quality brush in the direction of the grain.
Using Tiled Panels For Texture
Prefab panels, some of which have a nonslip finish, come in a range of patterns perfect for introducing changes of texture. Use a checkerboard design, for instance, or create your own larger and bolder version from panels of parallel slats. When laying prefab panels, take accurate measurements and space the joists carefully so that the panels are securely supported.