This is an excerpt from the Book called Home Improvements Manual. Continue reading to learn more about Finishing Basements thanks to the author.
Table of Contents
TogglePlanning For The Job
A finished basement can turn the cluttered family storage space into a pleasant area tailored for work or play.
Thorough and comprehensive planning for finishing the entire basement is essential, even though the actual work can be done in stages. What is the predominant purpose of the room or rooms you will create? For example, part or all of the area could be converted to a second living room, or a party room with casual or trendy furniture– a built-in bar, poker table, all under imaginative recessed ceiling lighting. Or the area could be remodeled into a cozy den or family room where the entire family can relax and enjoy television, stereo, and home movies. A recreation room containing ping pong, billiards, or bridge tables, and equipment for such games as archery and darts, is another possibility. Basements can also be finished and equipped to contain areas for workshops, a sewing center, a small gym with a sauna, a photographic darkroom, a home office, or even a home disco. Facilities and decor can range from the pragmatic to the offbeat. The only limitations are your own imagination and needs, your skills as a do-it yourselfer and your budget.
Damp-Proofing: One prerequisite for finishing a basement is that the foundation not leak water and that plumbing not drip condensation. Such problems can usually be cured, if they exist (sec Water proofing basements). Once you determine that your basement is dry or can be made so, go ahead with your planning. On many features, including the floor plan, you may have to make compromises. You will want to enclose the boiler or furnace in a fire-proof room and partition off the laundry facilities and any workshop or specialized spaces to separate them from recreation and living areas.
Building Codes: Remember that your finished basement must meet the requirements of you local building code. You will need a ceiling height of at least 7 1/2 feet; in some cases you can “raise the ceiling” by excavating the basement floor downward. This should be done by a professional since it may require the reinforcing of foundation walls. Adequate ventilation and a fire exit are also basic considerations.
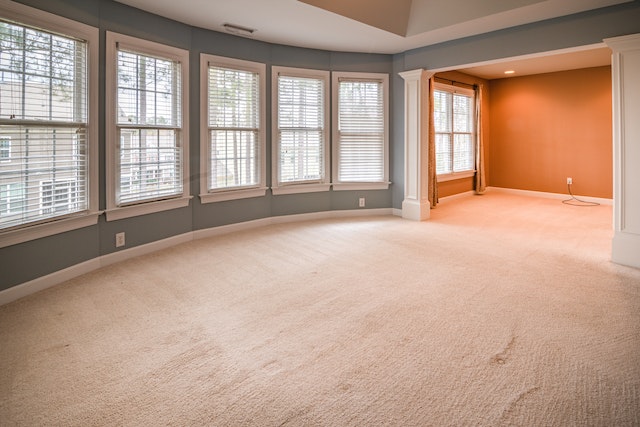
This drawing below shows a partly finished basement. The next two pages suggest alternatives for finishing, and give details for several practical projects. Chapters in this book on walls, floors, ceilings, partitions, electrical wiring, etc., show the basic techniques used in finishing basements.
This view of work in progress shows some of the common basement finishing features used by do-it-yourselfers. The ceiling is covered with acoustical tiles. The foundation walls of concrete block, are first overlaid with furring strips, then covered with paneling. The existing concrete slab floor is covered with a polyethylene vapor barrier, then panels of plywood as subflooring, and finally wall-to-wall carpeting. A roomy closet has been built under the stairs. On the right are built-in wall systems, shelves, and a bar. The built-up wood girder, or main beam, has been sanded and stained. Two steel Lally columns supporting the girder have been enclosed with paneling.
Finishing Basements
Work steps for each area
The jobs entailed in finishing a basement are generally approached in the following convenient sequence:
- Waterproofing.
- Framing partitions.
- Installing rough plumbing, heating units, and electrical wiring and boxes.
- Opening a new window,
- Furring out masonry walls for wallboard.
- Installing wall covering.
- Finishing the ceiling.
- Finishing the floor.
- Completing plumbing, heating, and electrical installations.
- Installing built-in bar, wall system, shelves, and cabinets.
Depending on the dryness of your basement and the features you plan for your renovation, you may omit one or more of the above steps, and alter the sequencer for others.
Most of the basic techniques used in finishing a basement are covered by other chapters of this book. Procedures that apply only to basements are described on these two pages.
General Considerations: Your basement may have a dry slab and foundation walls and still get damp occasionally as the result of moisture condensing from the air. A dehumidifier may be the solution. As added protection, you may even want to seal normally dry walls and their joints at the slab floor with a waterproofing layer of cement.
Because a basement’s temperature is moderated by the surrounding ground, it may not need its own separate heating system, or insulation, except in colder climates. A louvered screen in the furnace room partition can provide radiant heat and warm air to the rest of the basement. Hot-water or forced warm-air heating can be extended from the main system to the new basement rooms. However, this may affect heat distribution to the rest of the house, and the job should be analyzed by professions. Consider electric heat.
Walls And Partitions: Basement walls are relatively easy to finish. First, attach wood furring strips or stuns to the wall with masonry nails or adhesive, as shown on the opposite page. Cover the furring with a polyethylene vapor barrier, and then nail plasterboard or paneling to the furring. Shim the furring strips to make a level surface if the concrete wall is uneven. Be sure to leave small breaks at the intersections of furring strips for air circulation. To conserve energy in colder regions, insulate the walls (top, facing page) before closing them with plasterboard or paneling. Partitions and room dividers are built like conventional stud walls. A window can be opened at the top of the foundation, as illustrated on this page.
Ceilings, Pipes, Girders: Most basements lack enough headroom for suspended ceilings, but plasterboard or acoustical tile, fastened to a grid of turning strips nailed directly to the joists overhead, takes up little headroom and is easy to install.
In many basements pluming plumbing pipes are attached just below the exposed joists. Small pipes can sometimes be shifted upward to be covered by the new ceiling. A big soil pipe can be boxed in with stained boards or with textured plywood disguising it a wooden beam, as can a steel girder or main beam. Similarly, any steel Lally columns or posts that hold up the girder can be boxed with plywood or paneling.

Finishing the floor: Most basements have concrete slab floors that, if level, can be covered with vinyl floor tile, vinyl sheeting, or all-weather carpet. For better insulation and greater comfort, a plywood subfloor can be framed and installed over the concrete before tile or carpet is laid. If there is enough head-room in the basement you may want to install floor joists to create secure base underfoot and provide greater depth for insulation over the concrete slab.
Built-Ins And Lighting: A basement renovation can easily accommodate built-ins. Besides a bar, an entire wall can be lined with built-in shelves and cabinets. Under-stair closets, closets that hide unsightly pipes while also providing storage space, and deep but narrow alcoves for storing odd-shaped objects, such as golf clubs, pool cues, and card tables, are other possibilities.
A convenient way to light a basement is to install recessed lights that fit into the new tiled ceiling. Mood lighting can come from strategically placed track lights, and floor and table lamps. If you are planning a planter as a decorative accent, a couple of mercury vapor lamps should be focused on the plants to supply light for growth.
Stairs: Basement stairways can be enclosed with partitions or screened to make them less obtrusive. One idea for finishing a staircase is illustrated on the facing page.
The following pages contain instructions that apply to finishing a basement:
Waterproofing, electrical installations, plumbing installations, posts, beams, and joists, ceiling, non-bearing partitions, wall covering, flooring, staircases, built-ins and closets, fireplaces and stoves.
Waterproofing, electrical installations, plumbing installations, posts, beams, and joists, ceiling, non-bearing partitions, wall covering, flooring, staircases, built-ins and closets, fireplaces and stoves.
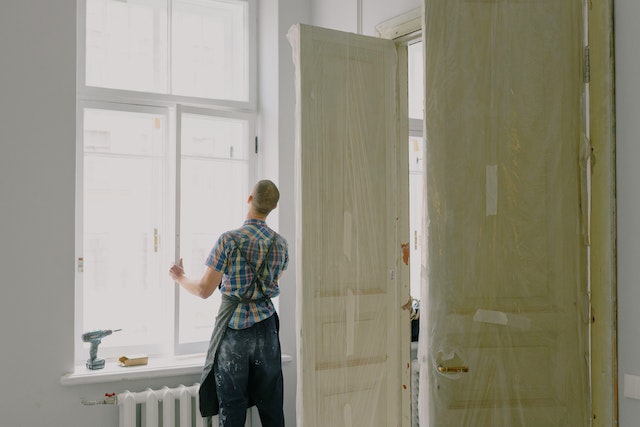
Opening A New Window
- A well for a new basement window is execrated ground outside foundation wall. Wall is non- forced with a liner, and layered with portion.
- Chisel out blocks and install a header and jack studs. Frame window to manufacturers rough opening (r.o.) specifications.
- Insert the entire window into the rough opening and secure it with screws or nails according to the manufacturer’s instructions.
- Caulk around the window frame inside and outside. Finish the inside wall surface with furring strips and plasterboard or paneling.
Insulating Basement Walls
Walls are shown furred with 1 x 3s for application of paneling. Insulation being glued to walls is ¾ in rigid foam. Vapor barrier goes over foam.
If your climate is very cold, thicker insulation can be installed between 2-x-4 studs, using 4-in thick fiberglass with toil side facing the room
Dowel-Pole Staircase
Dowel-pole railings (left) add a decorative touch and can be removed to move bulky objects down the stairs. The 2-in thick poles fit into holes in the ceiling and in the 2-x-6-in, base at the side of the staircase (above). The ceiling holes are 2 in deeper than the pole tops, so that by lifting each pole, it can easily be removed.
Boxing the I-beam
Steel girder is boxed to resemble a wooden beam by nailing a frame of 2 x 4s to ceiling joists, their covering it with plywood or Masonite.
Moving water pipes
Water pipes below ceiling joists are shifted upward to notches in the bottom of the joists, which must be reinforced with steel plates.
Boxing a large pipe
A large soil pipe under the joists is boxed in like the I-beam at far left, using a 2-x-4 frame and plywood or Masonite panels.